
101 in stock
$ 59.00
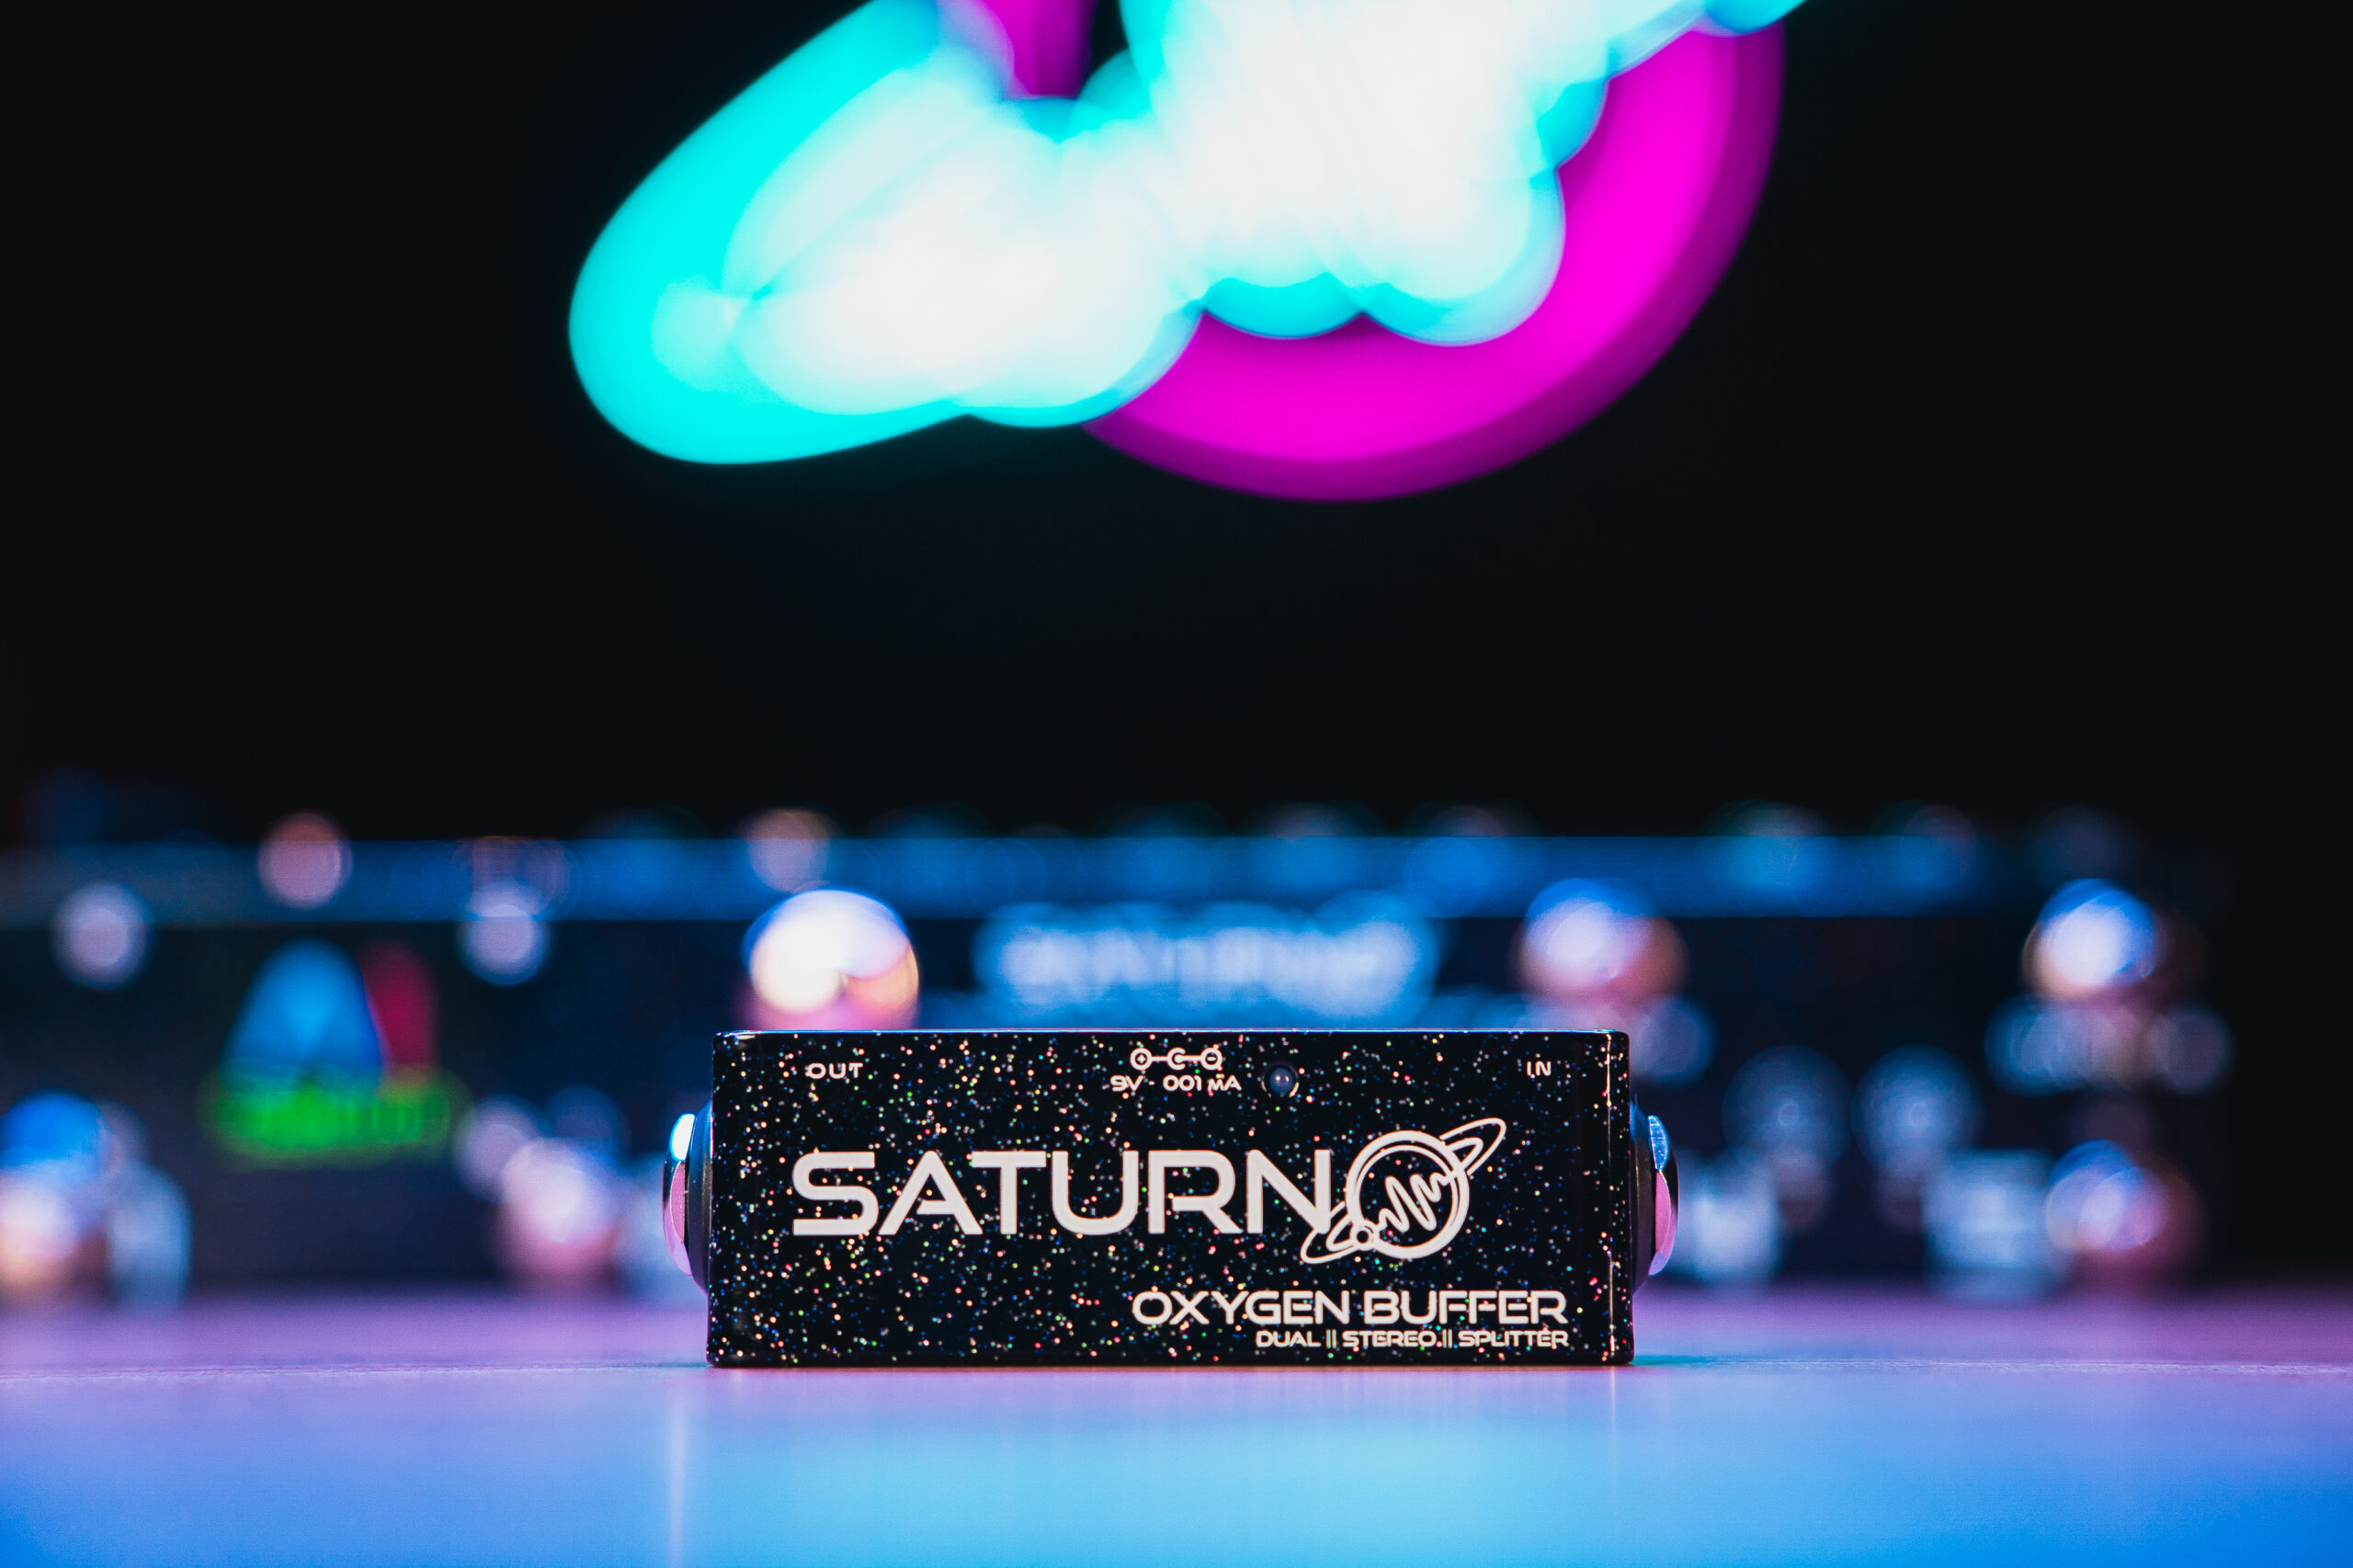
Length: 8cm | 3.15″
Width: 2.5cm | 1″
Height: 3cm | 1.2″
Weight: 100g | 0.22Lbs
80 Patches
5 Footswitches + Bank Up and Bank Down
4 Loops for Effects Selection
MIDI Output
USB A Output for connection to USB devices
USB Type-C Output for connection to computer and software updates
Expression Pedal Input
2 RemoteSwitch Outputs for amplifier channel control, tap tempo, etc.
Wireless Antenna for wireless communication
Color LCD Graphic Display
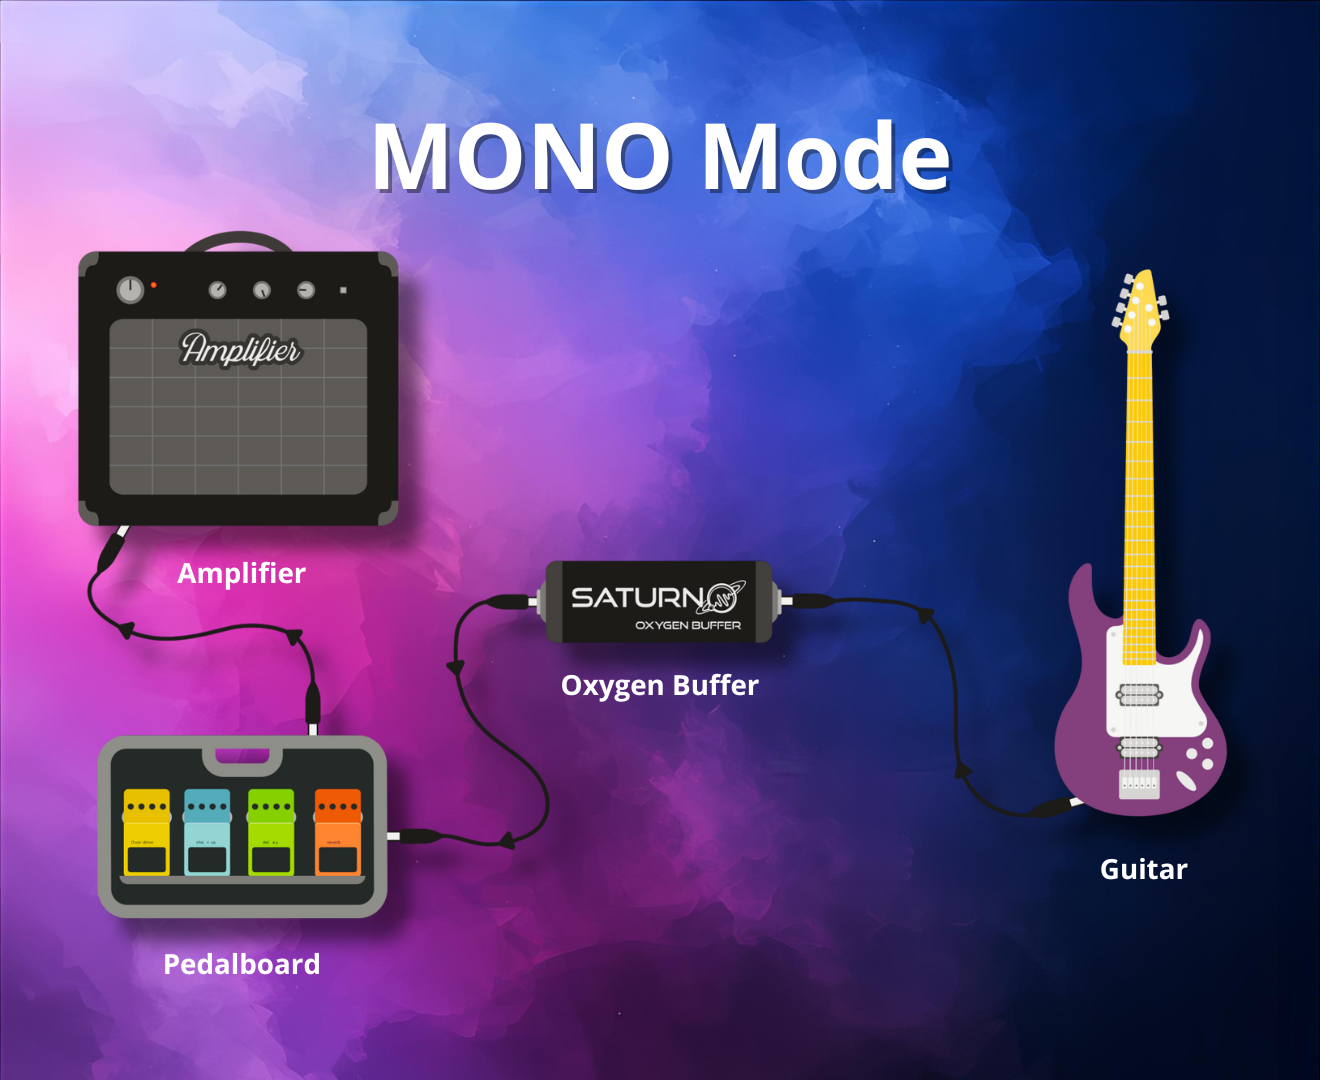
Usual application of a buffer, right at the entrance to the board.
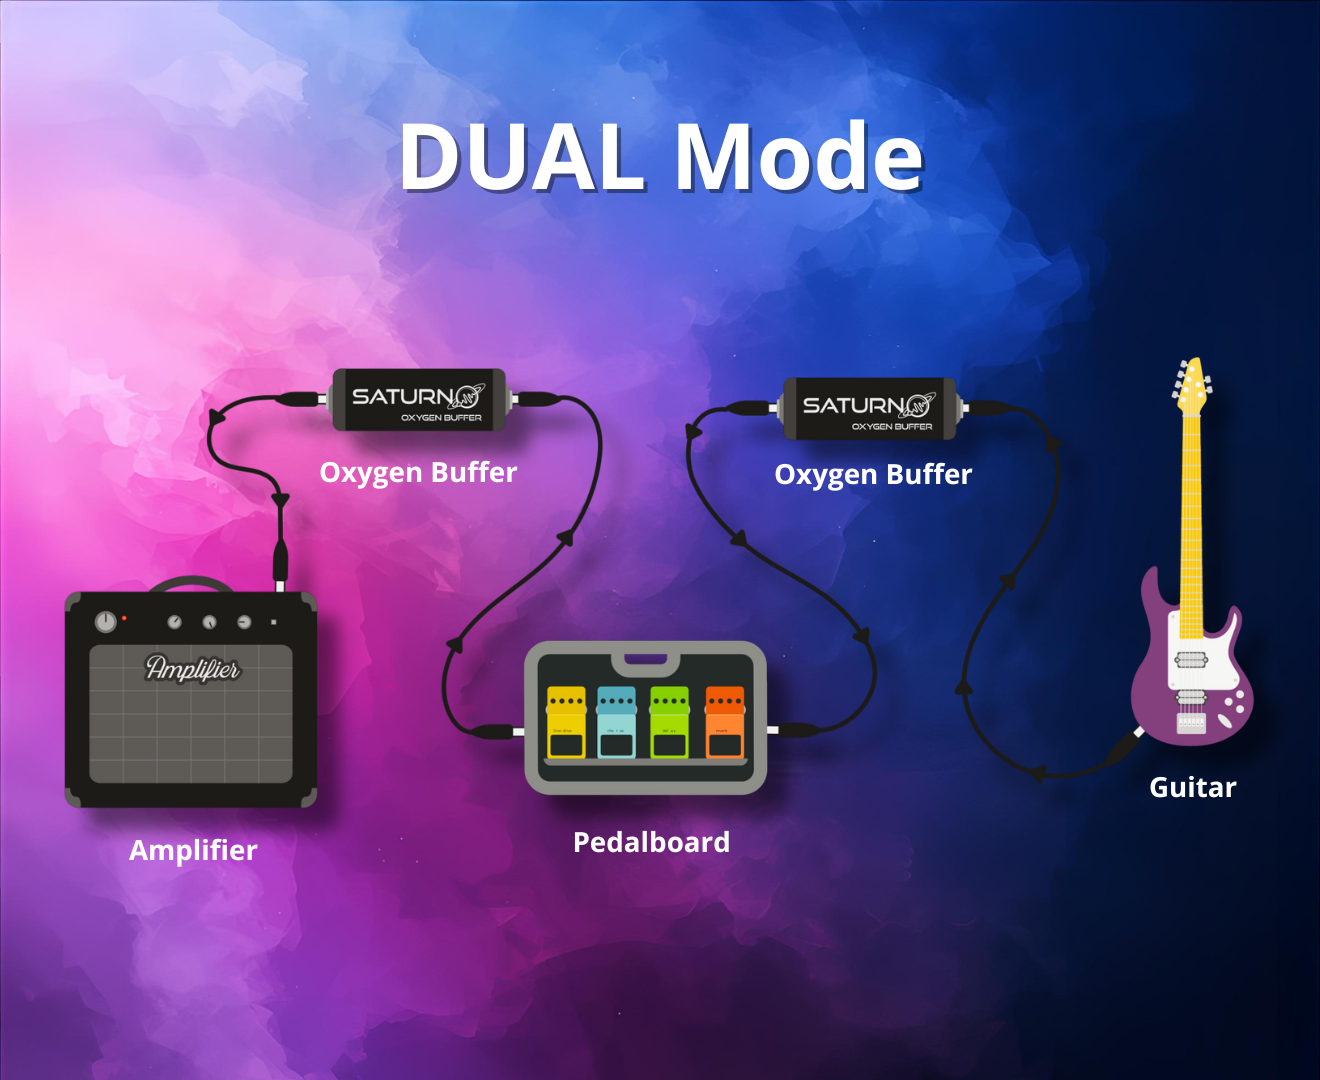
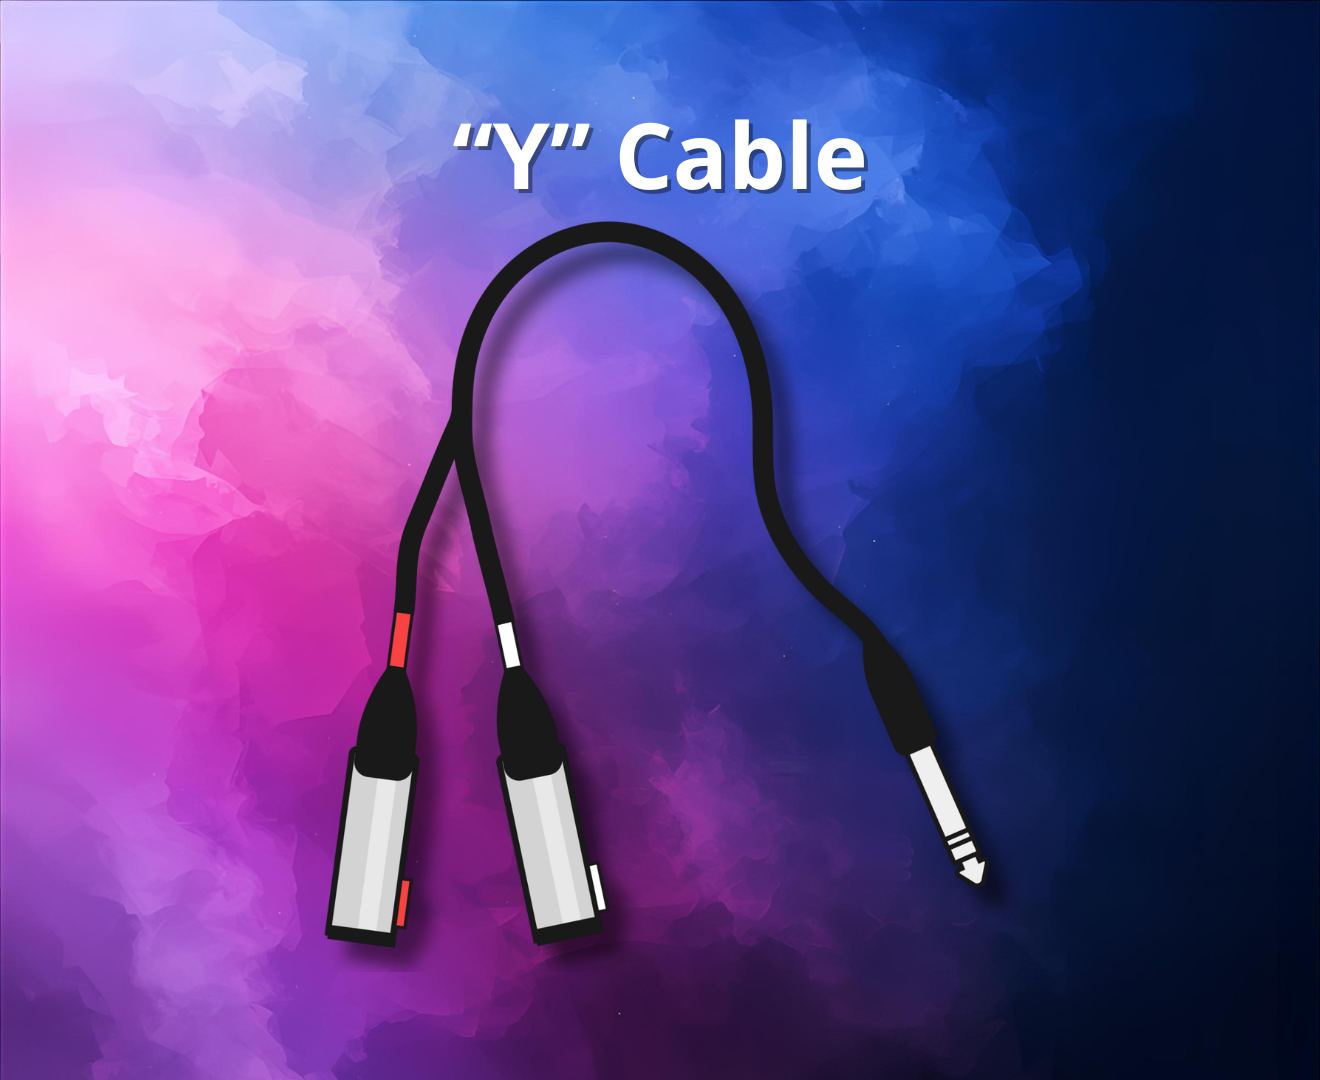
It’s possible to put the buffer at pedalboard input as well as the output in an ultra-compact size. (2x Stereo Y Cable Required)
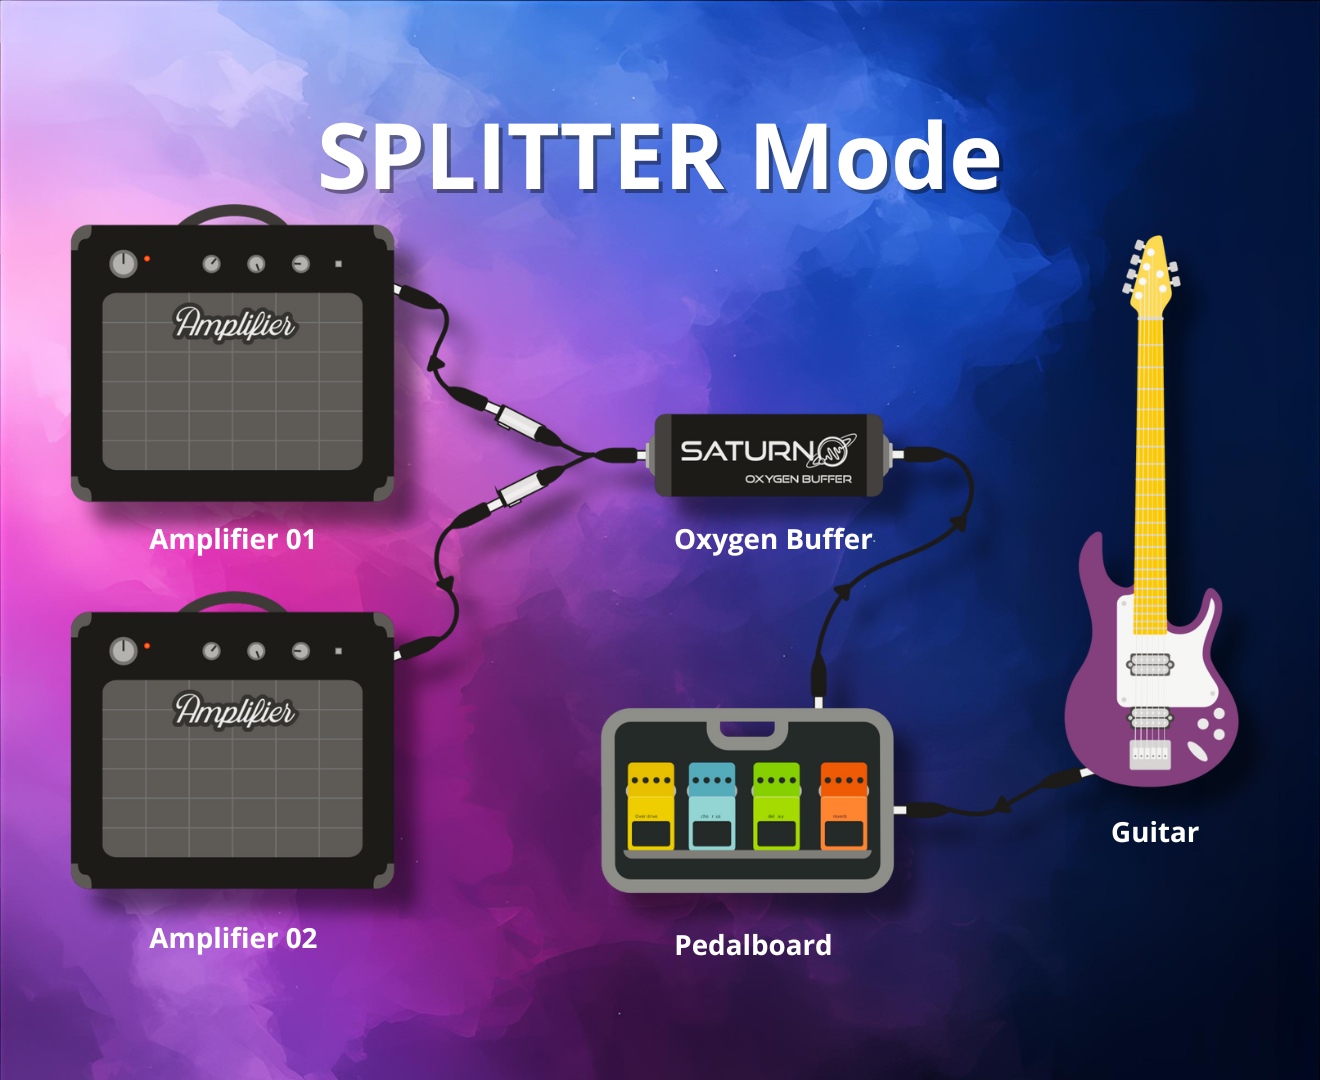
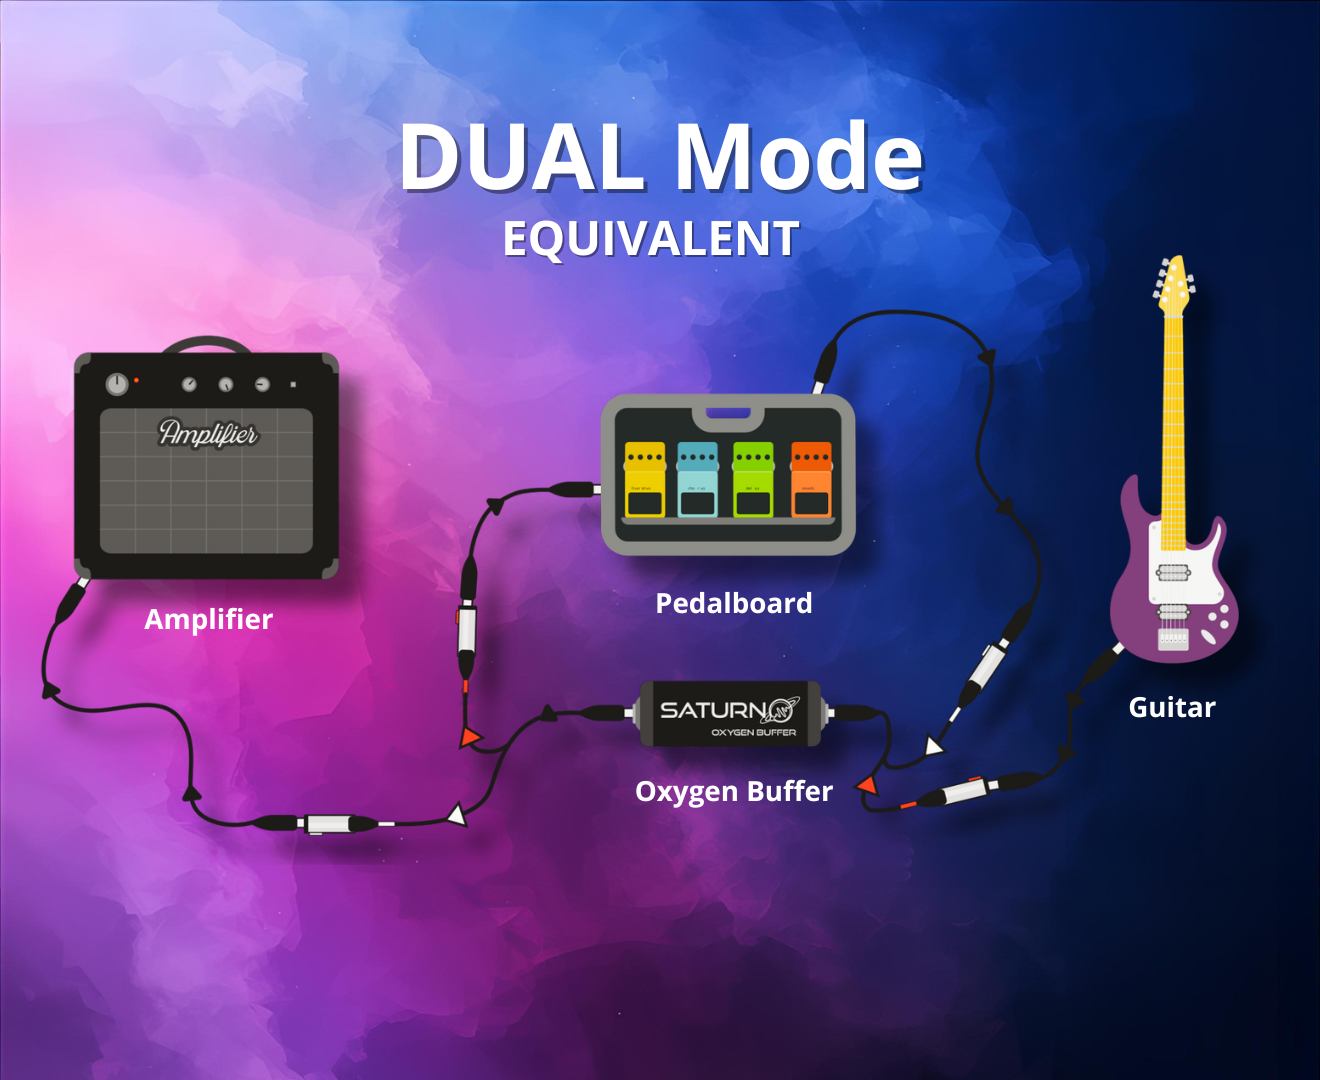
It is also capable of splitting the signal, allowing dual amp connections! (Stereo Y Cable Required)
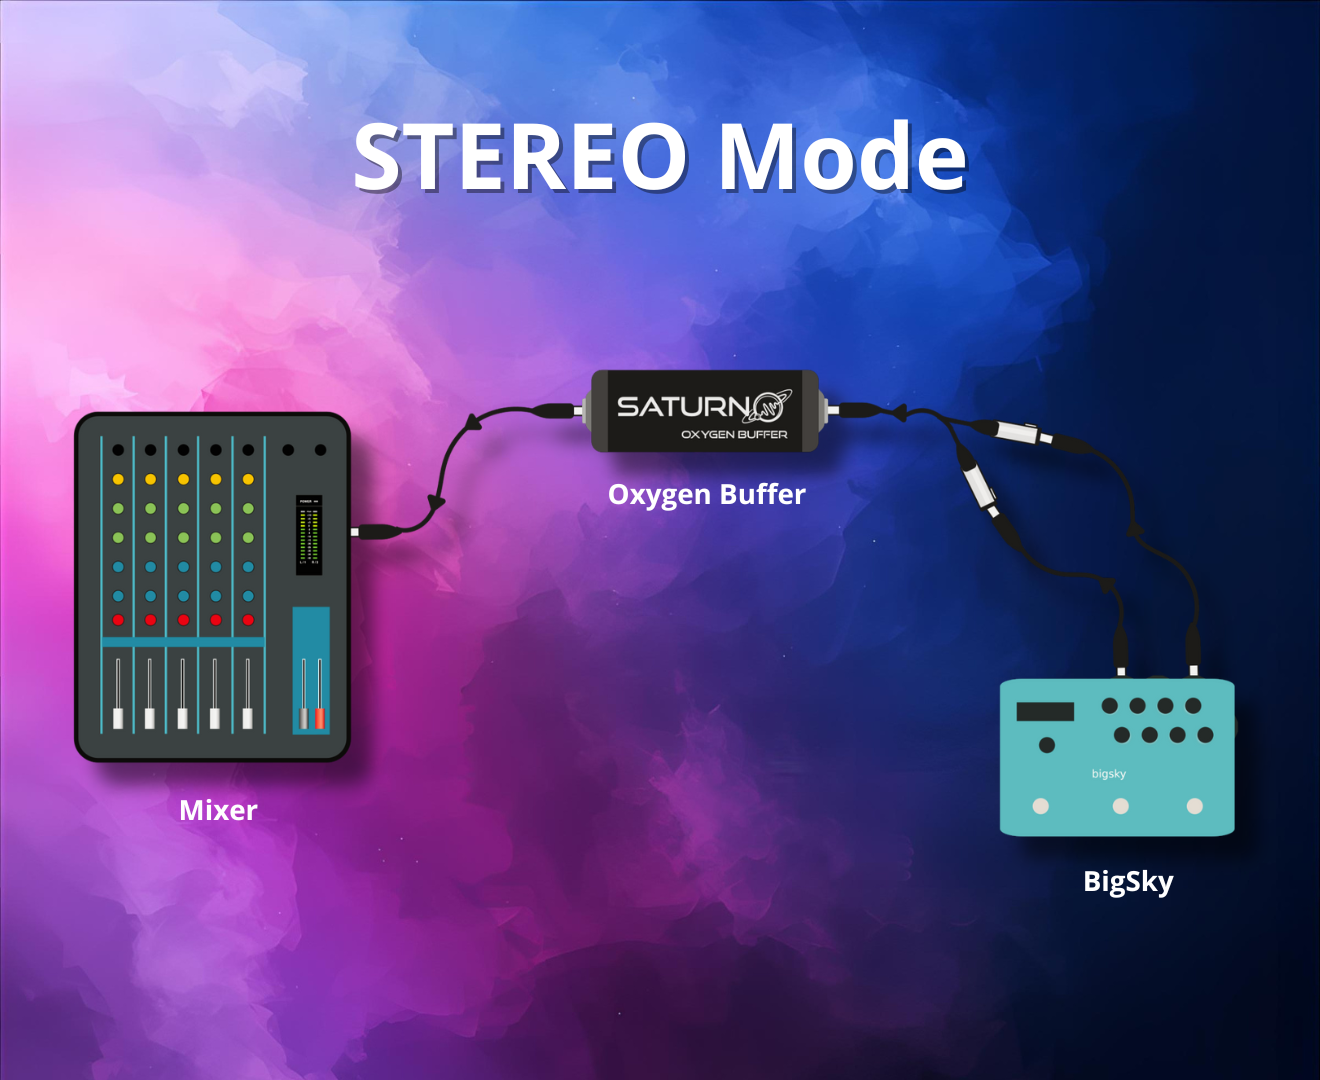
In Stereo mode, it will be able to buffer the left and right side of the signal. (TRS Cable

This switch is used to select the operating mode of the Buffer.
The diagram of the functioning of the different operating modes can be found in the manual.
It is recommended that the Oxygen Buffer be the first piece of equipment in your chain, right after the guitar. In this position, it will bring the greatest benefits to your signal.
However, it is important to note that the Buffer should be positioned after Fuzz effects and Vintage Wah pedals, as these devices can alter the tone when they are not in direct contact with the guitar.
Additionally, other positions that bring benefits to the signal include:
The guitar is known to have a high output impedance. With this high impedance, even a small capacitance present in the cable can create a filter that starts to attenuate the audible high frequencies, resulting in a loss of brightness in the tone.
By using the Oxygen Buffer, it has the ability to convert the guitar’s high impedance to a low impedance output. Once the signal is at low impedance, the filter formed begins to act in an ultra-high frequency region, well beyond the audible frequencies. This allows the signal to maintain all its integrity, without suffering brightness loss due to the filter formed between the guitar and the cable, resulting in a more faithful, clean, and accurate tone.
Additionally, another benefit of the low output impedance is the improvement in the impedance matching between the guitar and its effects/amplifier. This allows 100% of the signal to be transmitted to the effect/amplifier, whereas a signal with high impedance suffers losses. This improvement in impedance matching contributes to a complete signal transmission, ensuring a reproduction with more punch and dynamic tone of the guitar.
You can find the entire update procedure for your controller in the video (Hyperlink). Additionally, detailed instructions are also available in the product manual.
If the power in your city went out during the update of your controller and now you’re facing a white screen, don’t worry. There’s a recovery procedure that will solve this problem:
This procedure will fix the white screen and allow you to resume using your controller without issues.
101 in stock
$ 59.00
Length: 8cm (3.1 inches)
Width: 2.5cm (1 inch)
Height: 3cm (1.2 inches)
Weight: 0,210 kg (0,46 lbs)
Input Impedance = 1M Ohm
Output Impedance = 560 Ohm
Works with 9V and 18V
Power Supply: 9V ~ 18V (Negative Center)
Power supply not included
Cables not included
Maintains brightness and clarity even with long cables or multiple pedals in series — just like being plugged straight into the amp.
Your signal gains strength and dynamics, delivering attack and definition that make your guitar sound alive and present in any mix.
Say goodbye to muffled tone! Oxygen keeps every frequency intact, ensuring balance and consistency in any setup.
With Mono, Stereo, Splitter, and Dual modes, it adapts to any pedalboard — from the simplest to the most complex.
Made with high-quality components and smart design, it’s a compact, robust pedal built for players who demand professional performance.
Just plug it in and feel the difference: more sparkle, more presence, and that “breath” that brings your tone to life.
The Oxygen Buffer is the secret to keeping your tone breathing with clarity and punch, even in long or pedal-heavy setups. It preserves your brightness and dynamics, eliminates high-end loss, and ensures your signal hits the amp with the same strength as your guitar.
With premium construction and versatile modes (Mono, Stereo, Splitter, and Dual), Oxygen adapts to any pedalboard — delivering crystal-clear sound, instant response, and total fidelity.
Check out the most common options below and find out which one works best for you!
Typical buffer application placed right at the input of the board.
In Stereo mode, it can buffer the left and right sides of your signal.
It can also split the signal, allowing dual-amp setups.
You can place a buffer at the input of the pedalboard and another at the output — all in an ultra-compact format.
To set it up using a single buffer, you’ll need a Y cable, as shown in the image.
This switch selects the Buffer’s operating mode:
For Mono mode, either switch position works.
For Splitter mode, set the switch to Splitter.
For Dual or Stereo mode, set the switch to Dual.
You can check the operating diagrams for each mode in the manual.
It’s recommended to place the Oxygen Buffer first in your chain, right after the guitar. In this position, it delivers the greatest benefits to your signal.
Guitars naturally have high output impedance. With this high impedance, even a small amount of capacitance in the cable can act as a filter that starts cutting audible high frequencies — resulting in a loss of brightness.
When you use the Oxygen Buffer, it converts your guitar’s high impedance into a low-impedance output. Once the signal is low impedance, that cable-induced filter shifts way up into the ultra-high range, far beyond audible frequencies. This allows your signal to maintain its full integrity, with no loss of high end — resulting in a cleaner, more accurate, and more faithful tone.
Another benefit of low impedance is improved impedance matching between your guitar and your pedals/amp. This allows 100% of the signal to reach the effects or amplifier, while a high-impedance signal naturally suffers losses. Better impedance matching means more punch, more dynamics, and a fuller reproduction of your guitar tone.
However, keep in mind:
The Buffer should be placed after vintage Fuzz and vintage Wah pedals, as these rely on direct interaction with the guitar’s pickups and may change their character if a buffer comes before them.